This tutorial presents some of the fundamental features of the Dart language, and shows how to use them in practice.
Using them correctly leads to code that is clear, lightweight, and more robust.
1. Type inference
The Dart compiler can automatically infer the type of variables from their initializer, so that we don’t have to declare the type ourselves.
In practice, this means that we can convert this code:
String name = 'Andrea';
int age = 35;
double height = 1.84;
to this:
var name = 'Andrea';
var age = 35;
var height = 1.84;
This works because Dart can infer the type from the expression on the right side of the assignment.
We could declare a variable like this:
var x;
x = 15;
x = 'hello';
In this case, x is declared first and initialized later.
Its type is dynamic, meaning that it can be assigned from expressions of different types.
Takeaway
- Dart will infer the correct type when using
var, as long as variables are declared and initialized at the same time.
2. final and const
When a variable is declared with var, it can be assigned again:
var name = 'Andrea';
name = 'Bob';
In other words:
varmeans multiple assignment.
This is not allowed with final:
final name = 'Andrea';
name = 'Bob'; // 'name', a final variable, can only be set once
Final in practice
It is very common to use final when declaring properties inside widget classes. Example:
class PlaceholderContent extends StatelessWidget {
  const PlaceholderContent({
    this.title,
    this.message,
  });
  final String title;
  final String message;

  // TODO: Implement build method
}
Here, the title and message can’t be modified inside the widget, because:
finalmeans single assignment.
So, the difference between var vs final is about multiple vs single assignment. Now let’s look at const:
const
constdefines a compile-time constant.
const is used to define hard-coded values, such as colors, font sizes and icons.
But we can also use a const constructor when defining widget classes.
This is possible, as long as everything inside the widget is also a compile-time constant. Example:
class PlaceholderContent extends StatelessWidget {
  const PlaceholderContent({
    this.title,
    this.message,
  });
  final String title;
  final String message;

  @override
  Widget build(BuildContext context) {
    return Center(
      child: Column(
        mainAxisAlignment: MainAxisAlignment.center,
        children: <Widget>[
          Text(
            title,
            style: TextStyle(fontSize: 32.0, color: Colors.black54),
          ),
          Text(
            message,
            style: TextStyle(fontSize: 16.0, color: Colors.black54),
          ),
        ],
      ),
    );
  }
}
And if a widget has a const constructor, it can be built like this:
const PlaceholderContent(
  title: 'Nothing here',
  message: 'Add a new item to get started',
)
As a result, this widget is optimised by Flutter, as it is not rebuilt when the parent changes.
Takeaway:
finalmeans single assignmentconstdefines a compile-time constant- const widgets are not rebuilt when their parent changes.
- Prefer
constoverfinalwhen possible
3. Named & positional parameters
In Dart we define named parameters by surrounding them with curly ({}) braces:
class PlaceholderContent extends StatelessWidget {
  // constructor with named parameters
  const PlaceholderContent({
    this.title,
    this.message,
  });
  final String title;
  final String message;

  // TODO: Implement build method
}
This means that we can create the widget above like this:
PlaceholderContent(
  title: 'Nothing here',
  message: 'Add a new item to get started',
)
As an alternative, we could omit the curly braces in the constructor to declare positional parameters:
// constructor with positional parameters
const PlaceholderContent(
  this.title,
  this.message,
);
As a result, parameters are defined by their position:
PlaceholderContent(
  'Nothing here', // title at position 0
  'Add a new item to get started', // message at position 1
)
This works, but it quickly gets confusing when we have many parameters.
Named parameters help with this, because they make the code easier to write (and read).
By the way, you can combine positional and named parameters like so:
// positional parameters first, then named parameters
void _showAlert(BuildContext context, {String title, String content}) {
  // TODO: Show Alert
}
It is common for Flutter widgets to have a single positional parameter, followed by named parameters. The Text widget is a good example of this.
As a guideline, I always want my code to be clear and self-explanatory. And I choose to use named or positional parameters accordingly.
4. @required & default values
By default, named parameters can be omitted.
Omitting a named parameter is the same as giving it a
nullvalue.
And sometimes, this leads to unintended consequences.
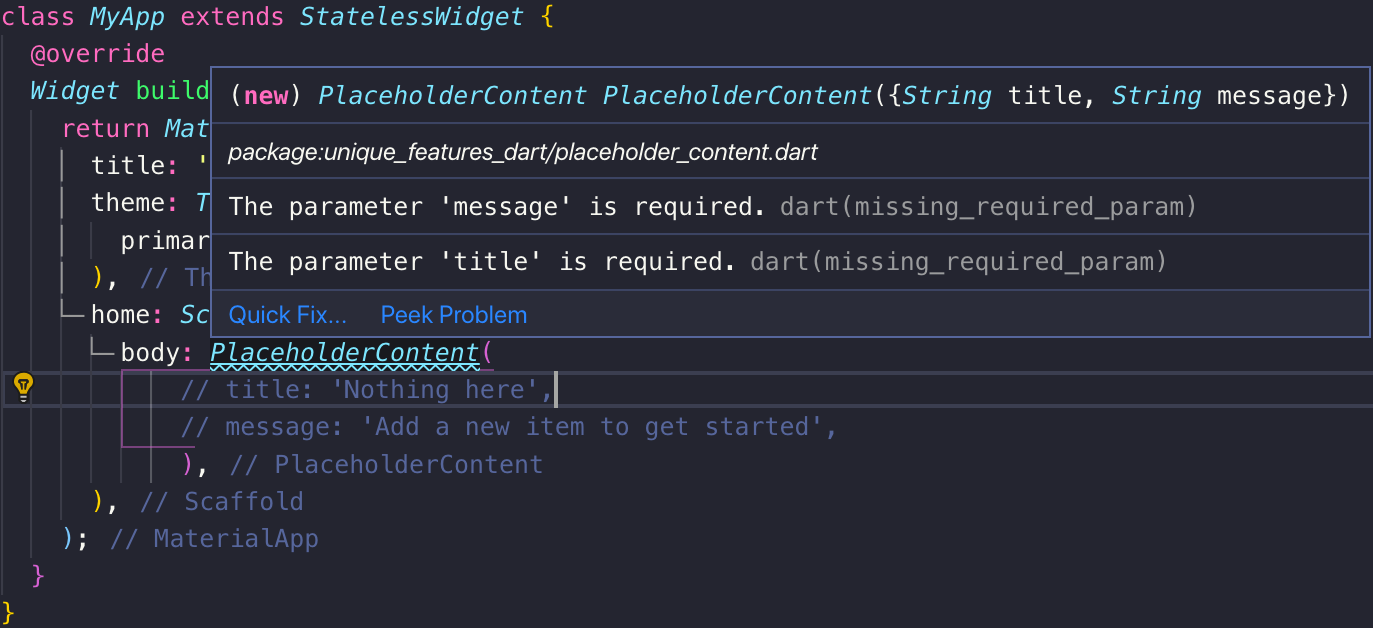
In the example above, we could define a PlaceholderContent() and forget to pass in the title and message.
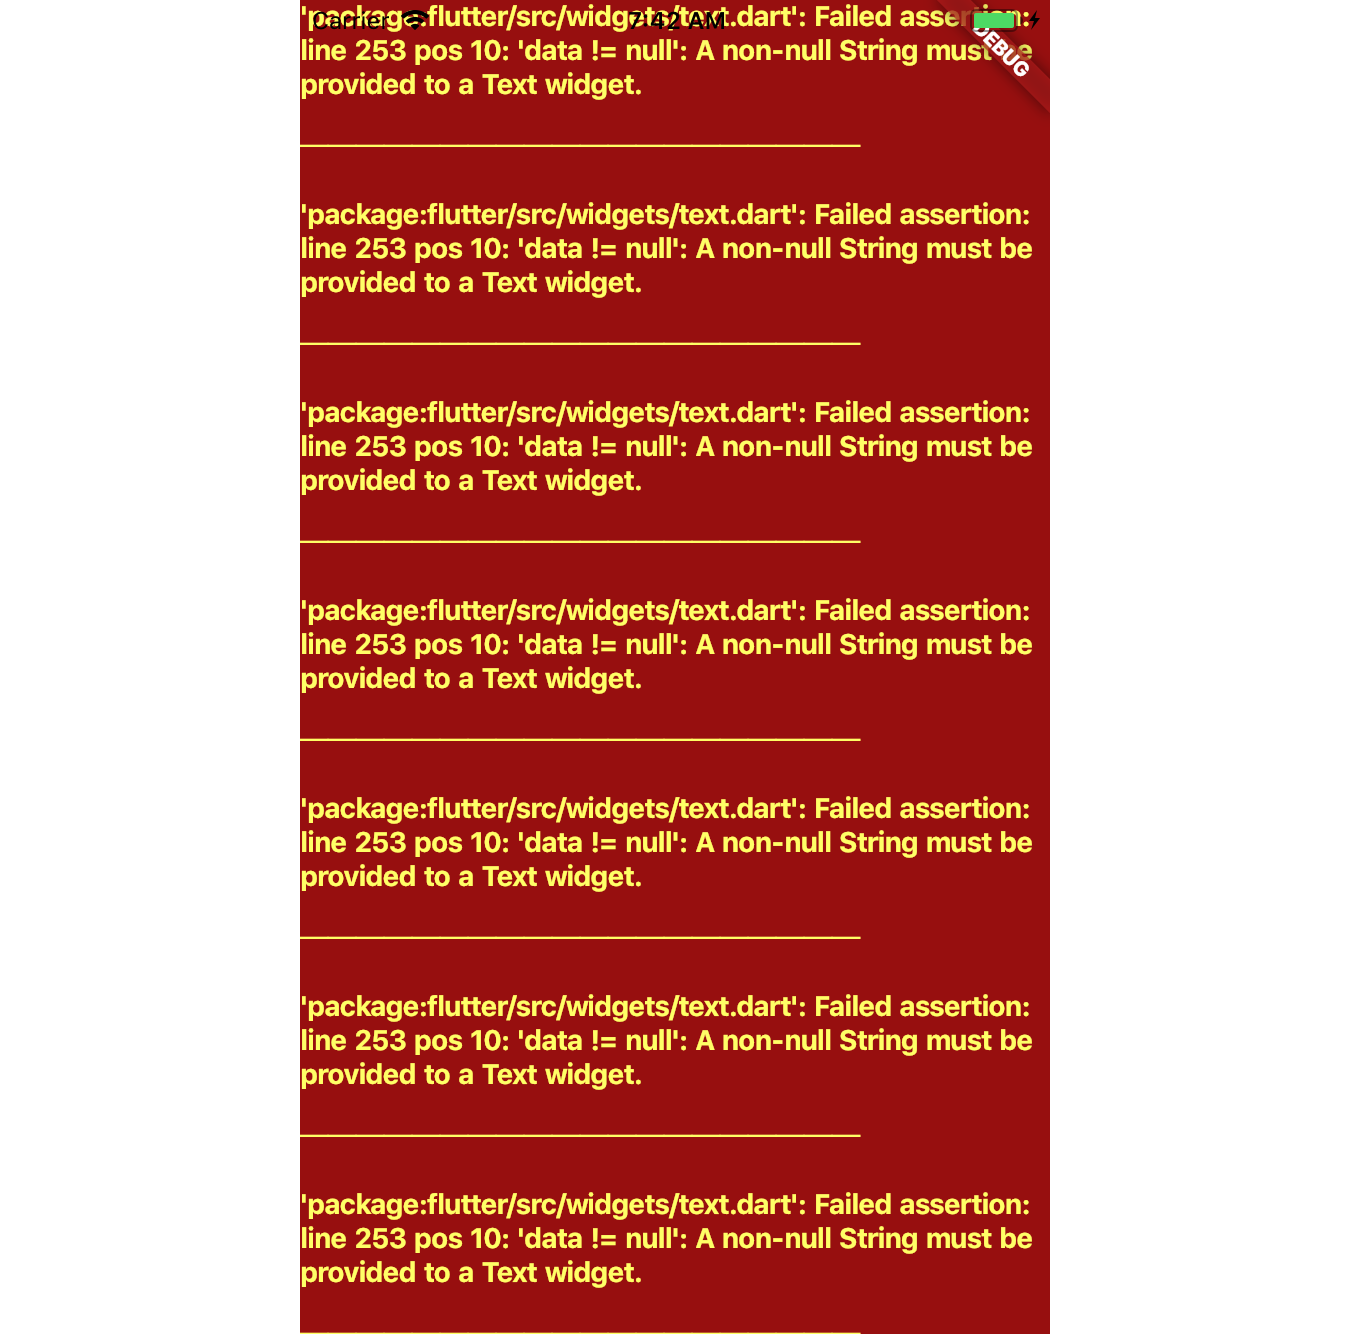
And this would lead to a red screen with an error, because we would then be passing null data values to the Text widgets, which is not allowed.

@required to the rescue
We can annotate any required parameters like so:
const PlaceholderContent({
  @required this.title,
  @required this.message,
});
And the compiler will emit a warning if we forget to pass them in.

Still, if we want we can pass null values explicitly:
PlaceholderContent(
  title: null,
  message: null,
)
And the compiler is happy with this.
To prevent passing null values, we can add some assertions:
const PlaceholderContent({
  @required this.title,
  @required this.message,
}) : assert(title != null && message != null);
Our code is safer with this change, because:
@requiredadds a compile-time checkassertadds a runtime check
And if we add asserts to our code, then runtime errors are much easier to fix, because they will point exactly to the line that caused the error.
non-nullable types
@required and assert make our code safer, by they feel a bit clunky.
It would be nicer if we could specify that an object cannot be null at compile time.
This is accomplished with non-nullable types, which were built into Swift and Kotlin from the start.
And non-nullable types are currently being implemented in the Dart language.
So we can cross fingers and hope they arrive soon. 🤞
Default values
Sometimes it is useful to specify some sensible default values.
This is easy in Dart:
const PlaceholderContent({
  this.title = 'Nothing here',
  this.message = 'Add a new item to get started',
}) : assert(title != null && message != null);
With this syntax, if the title and message are omitted, then the default values are used.
By the way, default values can be specified with positional parameters as well:
int sum([int a = 0, int b = 0]) {
  return a + b;
}
print(sum(10)); // prints 10
Wrap up
Code is written for machines to execute, and for other humans to read.
Life is short. Be nice and write good code 😉
- It makes your apps more robust and performant.
- It helps teammates and your future self.
Happy coding!
LEARN FLUTTER TODAY

Sign up for updates and get my free Flutter Layout Cheat Sheet.